Overview
Posting shifts in batch quantities is easy and convenient. In this article, we will go through how to maximize time by posting and editing shifts in bulk.
Getting Started
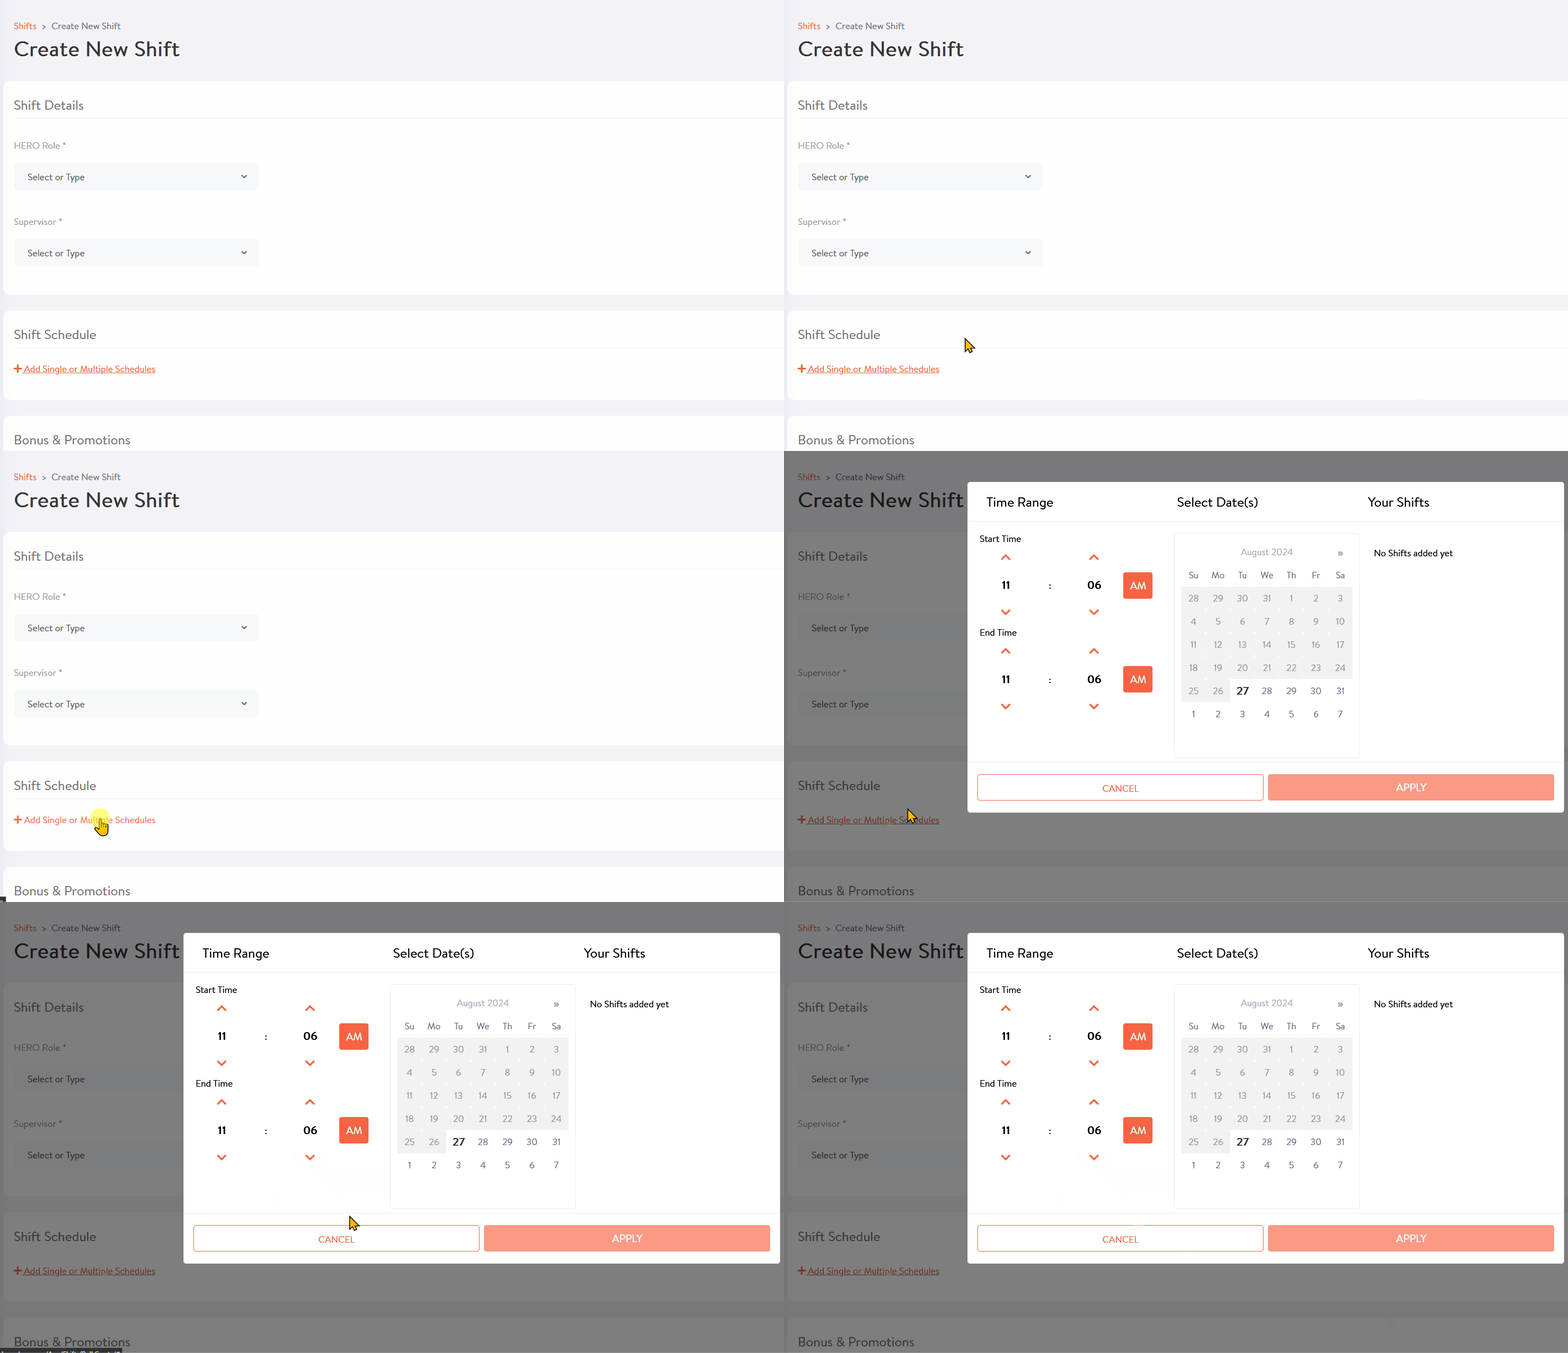
When you create or post a new shift, there will be a section titled Shift Schedule on your page. There, you can find a text link labeled Add Single or Multiple Schedules. Click on the link. A modal will open with three columns:
- Time range
- Select Date(s)
- Your shifts

Adding Multiple Shifts
Within your modal:
- Select a start time and end time for one of your shifts.
- Select one or multiple dates that the start and end times apply to.
- The dates selected will appear under the Your Shifts column. Adjust the quantity of each shift on that specific date if necessary.
- Click Apply
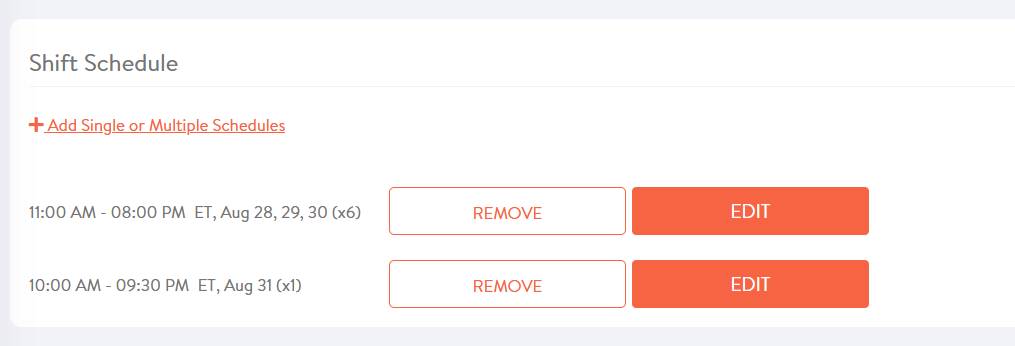
The modal will close and the shifts added will be recorded under the shift schedule section. If you need to edit those shifts, click the Edit button. You can also click Remove to discard. If you want to add additional shifts for a different time and date, click Add Single or Multiple Schedules again. You can do this as many times as you want up to 50 shifts. Once you have filled out the rest of the details on your Post a Shift page, click Post a Shift. All shifts listed under that posting will contain the same subset of details specified such as:
- HERO Role
- Supervisor
- Bonus Amount
- Promote this shift
- Hail a HERO
- Description
- Vaccination question answers

Editing, Duplicating, and Deleting Multiple Shifts
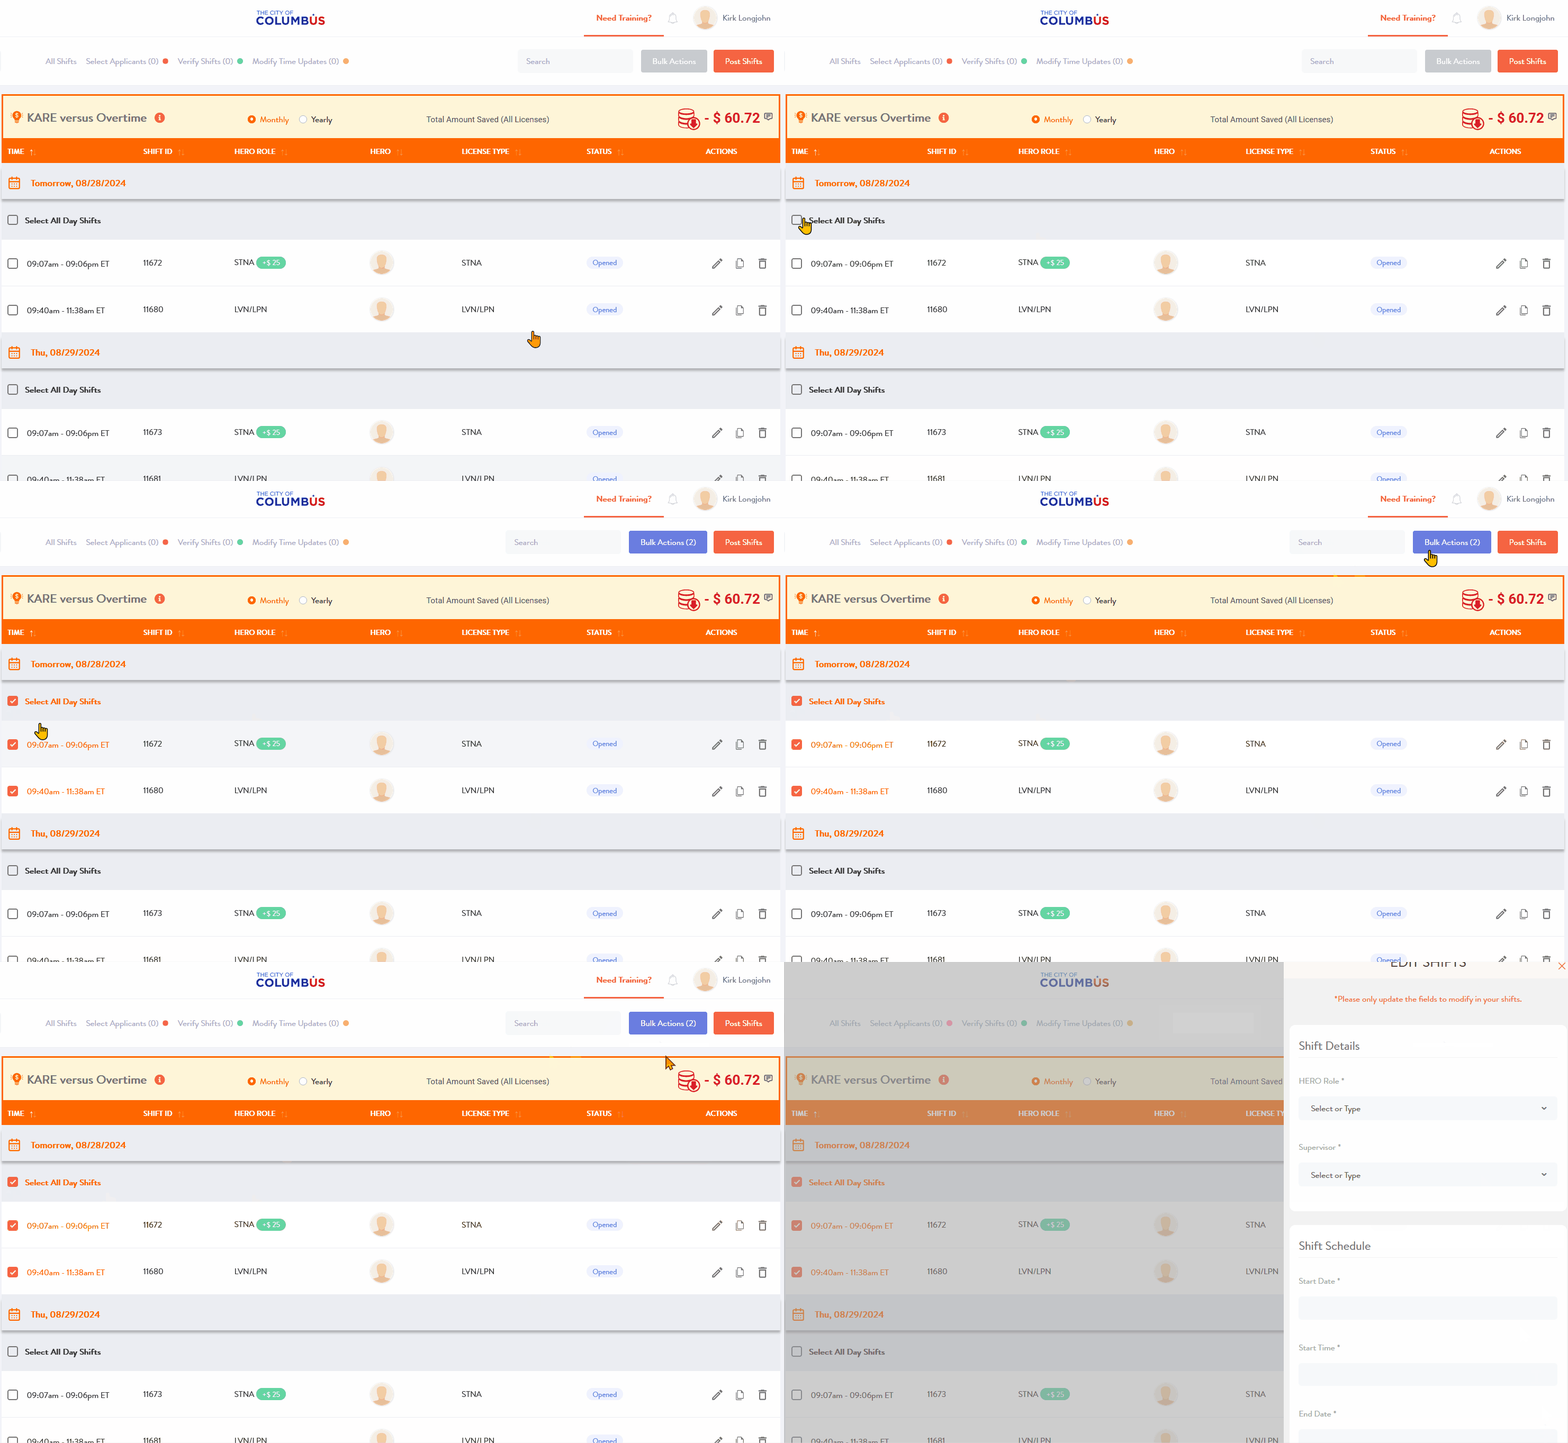
When selecting multiple shifts, a button at the top of the page titled Bulk Actions will illuminate in purple. Click the Bulk Actions button
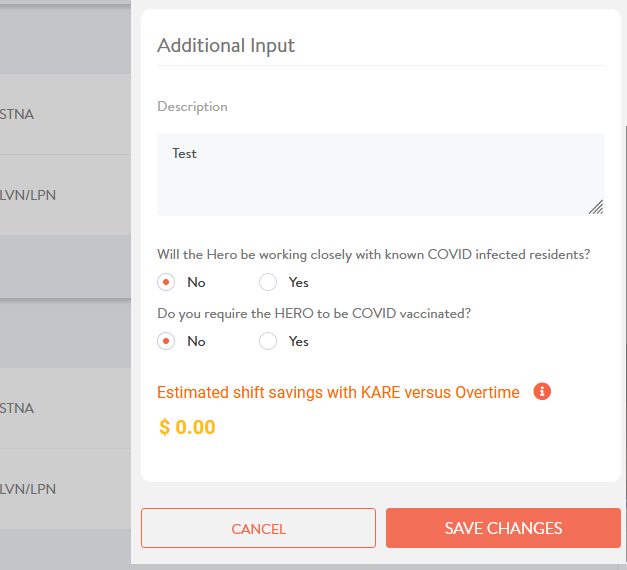
After clicking Edit, a slideout will appear with the shift details.

All shift details can be changed and applied from the slideout by clicking Save Changes.

Need Help?
Our KARE Support Team is here for you:
- General Support: (832) 380-8740
- In-App Messaging: Available daily in the KARE app.
- Email: herosupport@doyoukare.com
We will get back to you as quickly as possible.


